
 Using Canva's 4 row grid as a guide, I positioned the words to fit between the middle two rows and set the background to black. EASY! :)
 See my previous post for how to create a one-size-fits-all image and how I use 1 image for 6 social media networks.
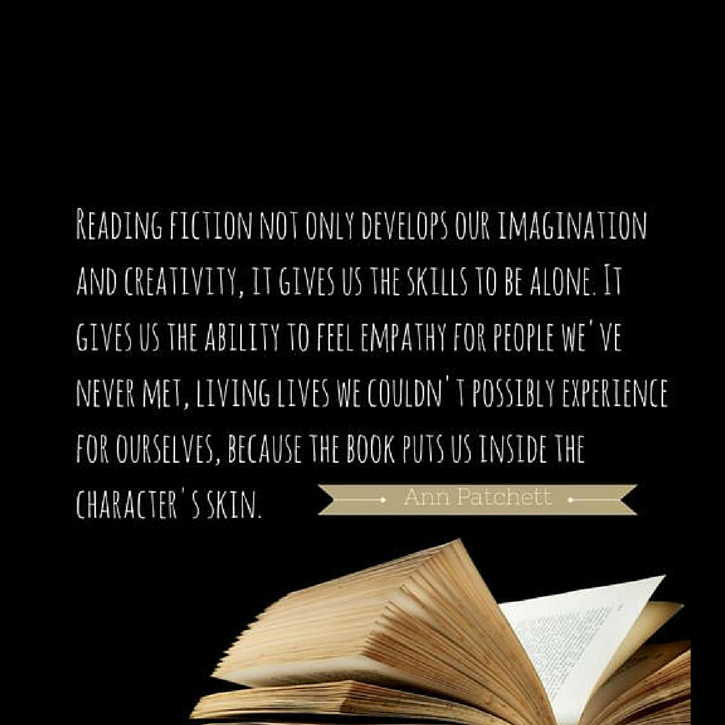
Check out the social media assets that I've designed for my campaign. Want to build schools too, but are afraid of not raising enough funds to build a school? Join my team! Together we can raise more funds. To find out more and / or to make a donation, click on the button below.
Comments
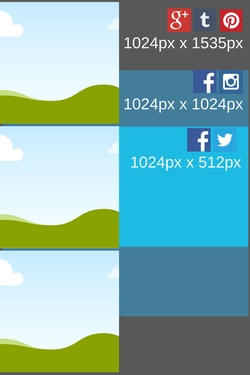
The previous post describes how I created a single optimised image that works across all social media channels. Now that I have one image that works Tall and Wide and can be resized into a Square via Instagram's in-app photo editor, what are the minimum number of steps required to post across all the different social media networks?
OPTIMIZED APPROACH: Use your secret Buffer email, a secret Buffer account, Instagram and IFTTTCreate a Buffer "Vault" account: If you have many profiles and many networks to post to, the simplest way is to create a Buffer account that doesn't post (just remove all the posting times from the Schedule tab - Buffer suggests using this to store your best performing posts too). Use your secret Buffer email to send your Tall image to your Vault by adding "@p vault account name" in the body of the email. When in Instagram, crop your image to Square. Use an IFTTT recipe to send your Square photo to the same "Vault". You can find your secret Buffer email here. (You can also find advanced commands that allow you to post to specific profiles / networks, except Pinterest). 100% mobile solution - once you've created your optimized image on your desktop via Pablo 2.0 or Canva or Fotor or Be Funky and emailed it to yourself, you can do everything else from your mobile (e.g. post to Instagram, re-Buffer while you're in a cab, on the bus etc) Maintain Buffer Analytics - while you want to use Instagram to crop your photo, you do not want to post to Facebook via the app as you lose the analytics. 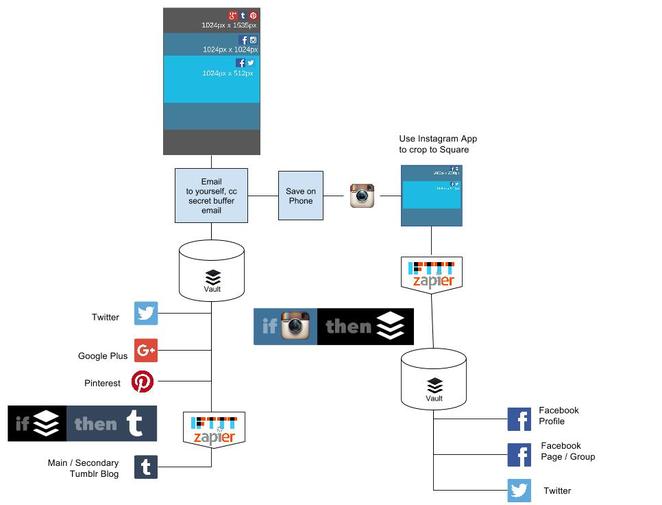 My previous solutions involved lots of IFTTT/Zapier recipes and this saves you from having to set up many individual recipes. It also avoids any risk of circular references (which happened to me once with a disastrous IFTTT recipe between Facebook and Tumblr). I now make an effort to map out any automation flows so as not to trigger any circular references. Regardless of which tool you used to create the image, this option allows you to post Tall images to Pinterest, Google Plus, Tumblr, Square images to Instagram and Facebook and an optimized Wide image to Twitter with only one image. Do we really need a one size fits all hack when there's Canva for Work and Pablo 2.0?It may not always be optimal to use this 'one size fits all' hack. Amazing tools like Canva for Work and Pablo 2.0 have made it so much easier for us to produce compelling images with custom dimensions on the fly and these tools are getting better each day. However, I would also like to challenge your thinking by asking if custom dimensions are really necessary just because the different social media networks have arbitrarily decided to define different "ideal sizes" for images and because we now have the tools that enable us to create them? Should one aim to customize or optimize? If we can optimize for multiple social media networks with 1 image, should we not? Money and time creating the images are not the only things saved; storage space (especially on the mobile phone) is reduced, version control issues minimised, and less filing and management of visual assets will be required. Please participate in the poll below! Would love to know what you think!
 If you found this hack useful, if you never knew about the secret Buffer email, and if you think this will save you time and effort when managing your social media strategy, or even if you thought this was a total waste of time and a ridiculous idea, please consider making a small donation towards the school that I am trying to build with Pencils of Promise so that children in Laos can have a chance at having a quality education. 30% of children in Laos are illiterate and $25 will provide a child with education for one year - that could transform their lives forever. After all, time is money. If you think this hack will save you an hour of work, please consider making a $25 donation here.
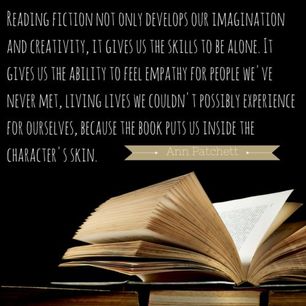
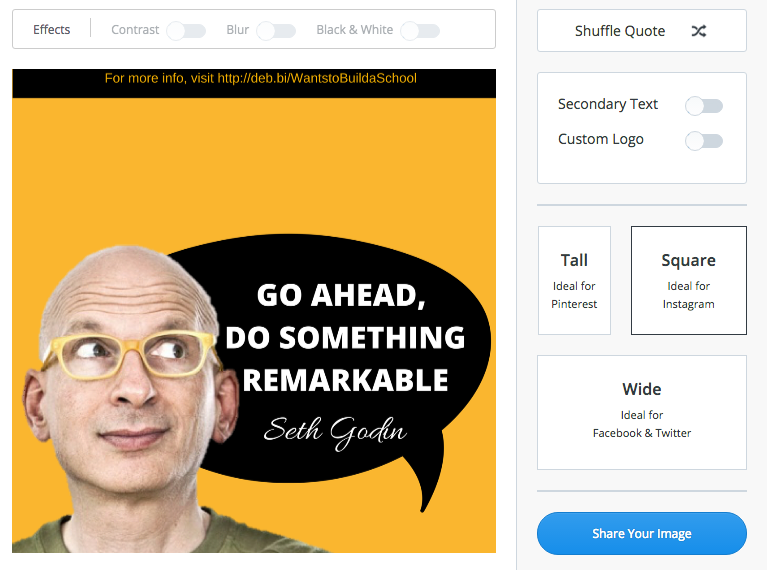
While we have the luxury of crafting a 735x1102px image for Pinterest versus a 1080px x 1080px image for Instagram and hypothesizing about how to use fancy automation formulas to post across multiple devices, there are also 250 million children who are unable to read or write and 75M who do not have access to education. If these children were to form a country, that would make it the 3rd largest country in the world, tied with Indonesia, with ony China, India and the USA larger than it. Every child deserves a education and you can help to provide that with a simple donation. TED prize winner Sugata Mitra and Pencils of Promise's founder Adam Braun are also working on a hack that will allow children in developing countries to catch up with the developed world in terms of education. To find out more, click here. Would love to know what you think about optimization vs customization and whether you think using one size for all can work! Leave your comments in the section below! If you made it this far down the post, here are three bonus hacks: Download or Remix the template on Canva All the IFTTT recipes I created My Design Vault - so you can see how many attempts it took me to get this right How I Created a One-Size-Fits-All Image (by studying Buffer's Pablo 2.0 and Canva's Magic Resize)10/19/2015 Buffer, one of my favourite companies, recently released an upgrade to their image sharing tool Pablo, allowing you to resize your images for different social media channels. While it only offers three sizing options (horizontal, vertical and square) whereas Canva for Work offers the option to resize your image to any custom dimension of your choice, this is the only FREE option that allows you to resize images on the fly that are optimized for Facebook, Instagram, Twitter and Pinterest. Best of all, you can use it with any image found on the internet by right clicking the image. Pablo 2.0 currently does not allow you to zoom or crop your background on your own and it does the resizing for you. Once your image is resized, you are not able to move it around. This works nicely if the focal point of your image is in the middle and Pablo does a nice job of resizing it, but is a problem if your focal point is either at the bottom or the top of the image. (See below for an example of an image that I loaded into Pablo, where I am unable to move my resized image up). 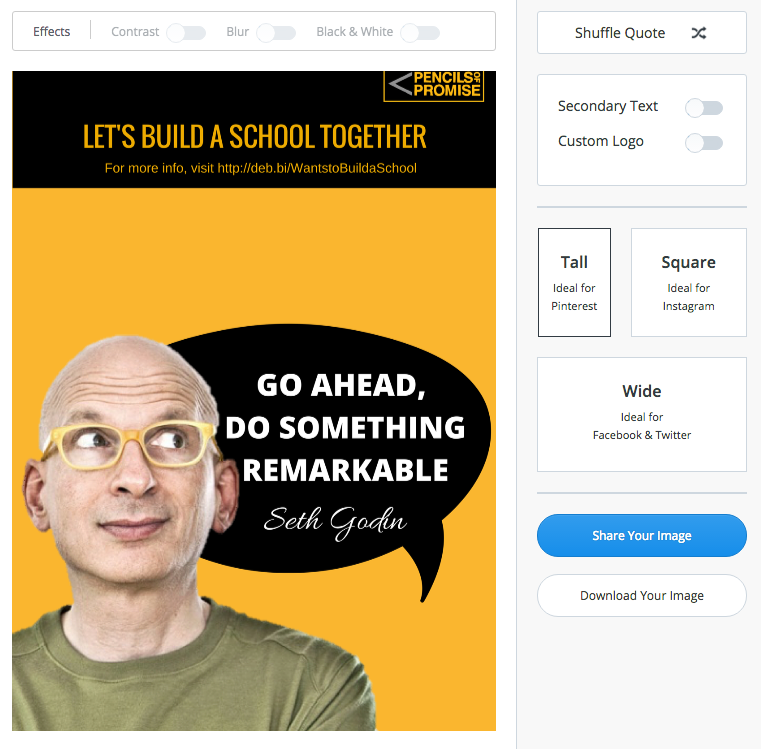
 STILL TOO MANY STEPS Whichever tool you use to create your images, the fact remains that if you wish to post across multiple social media channels (especially Instagram where you not only have to create the image, but also have to upload it to your phone), there are still a lot of steps involved. In this example, in order to post 3 image sizes across 4 channels, you need to:
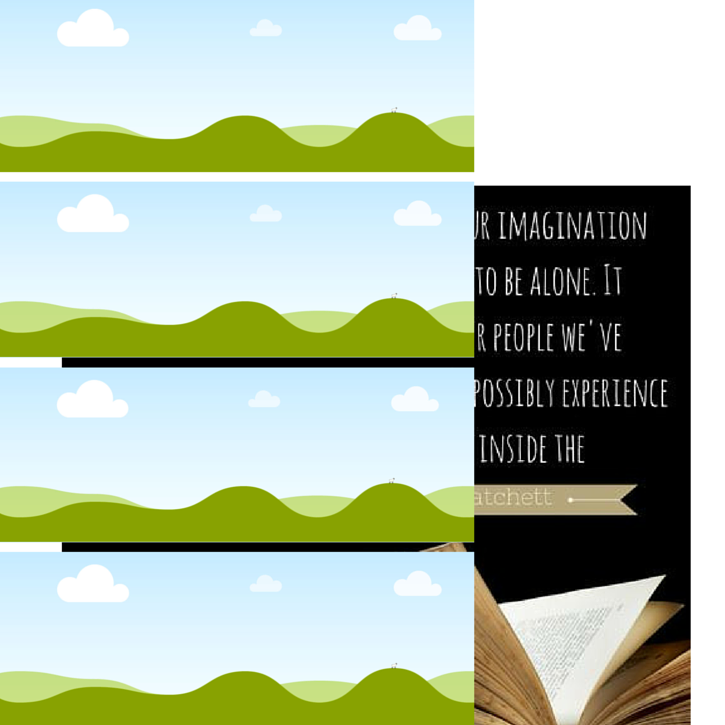
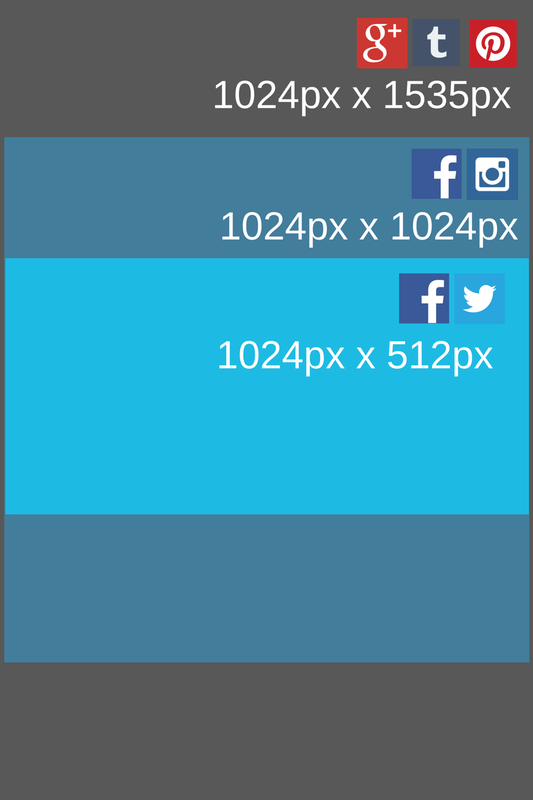
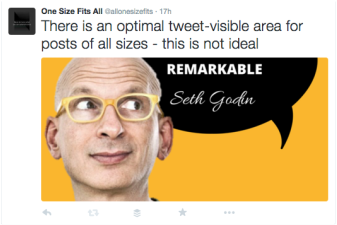
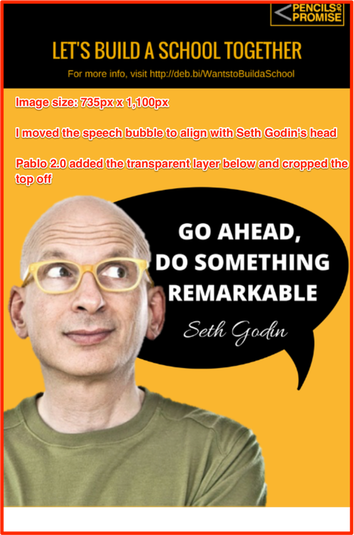
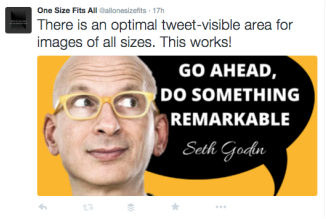
That's a total of 11 steps and does not include posting to Tumblr or Google Plus. IS THERE A 'ONE SIZE FITS ALL' HACK? I have been hypothesizing about creating a single optimal size that works across all social media channels. Currently, if you use a Tall image on Facebook or a Wide image on Pinterest, while it is not ideal, you can still get away with it because the entire image is shown. However, using a Tall or Square image on Twitter does not work because Twitter will only show a portion of your original image to fit it's 2:1 image frame, with the rest of your image hidden unless someone clicks to expand it. After a lot of experiementation, this is what I found. Twitter wlll post either the middle of your image (i.e. in the light blue section of the post on the right), or it will focus on showing faces found in the image (I suspect Twitter has some sort of facial recognition technology - if you go to my test Twitter account @allonesizefits, you can see that despite using many different Seth Godin image sizes and positions, Twitter shows the exact same shot of his entire face.) Therefore, if I want the quote to be shown in full, I have to ensure that the speech bubble is aligned with his head. In the images below, the left one was made in Canva with the recommended Pinterest image size 735px x 1,102px. This does not work as a tweet (shown below, click on the link to see in Twitter), as it shows his face but hides the top part of the quote. On the right, I have the image which I uploaded to Pablo (just slightly smaller at 735px x 1,100px) but in this image, I moved the speech bubble down such that it is aligned with Seth Godin's head. If I tweet this image (see below), it works!
Now that we've established how to create one single image that is optimized for all four social media channels (Facebook, Instagram, Twitter and Pinterest), let's see how many steps we can eliminate in order to simplify the process. Please see the next post for my suggested approach!
|
Categories
All
DEBORAH KAYThis is a simple blog to track my fundraising activities and to keep family, friends and supporters updated on my progress. Archives |


 RSS Feed
