
How I Created a One-Size-Fits-All Image (by studying Buffer's Pablo 2.0 and Canva's Magic Resize)10/19/2015 Buffer, one of my favourite companies, recently released an upgrade to their image sharing tool Pablo, allowing you to resize your images for different social media channels. While it only offers three sizing options (horizontal, vertical and square) whereas Canva for Work offers the option to resize your image to any custom dimension of your choice, this is the only FREE option that allows you to resize images on the fly that are optimized for Facebook, Instagram, Twitter and Pinterest. Best of all, you can use it with any image found on the internet by right clicking the image. Pablo 2.0 currently does not allow you to zoom or crop your background on your own and it does the resizing for you. Once your image is resized, you are not able to move it around. This works nicely if the focal point of your image is in the middle and Pablo does a nice job of resizing it, but is a problem if your focal point is either at the bottom or the top of the image. (See below for an example of an image that I loaded into Pablo, where I am unable to move my resized image up). 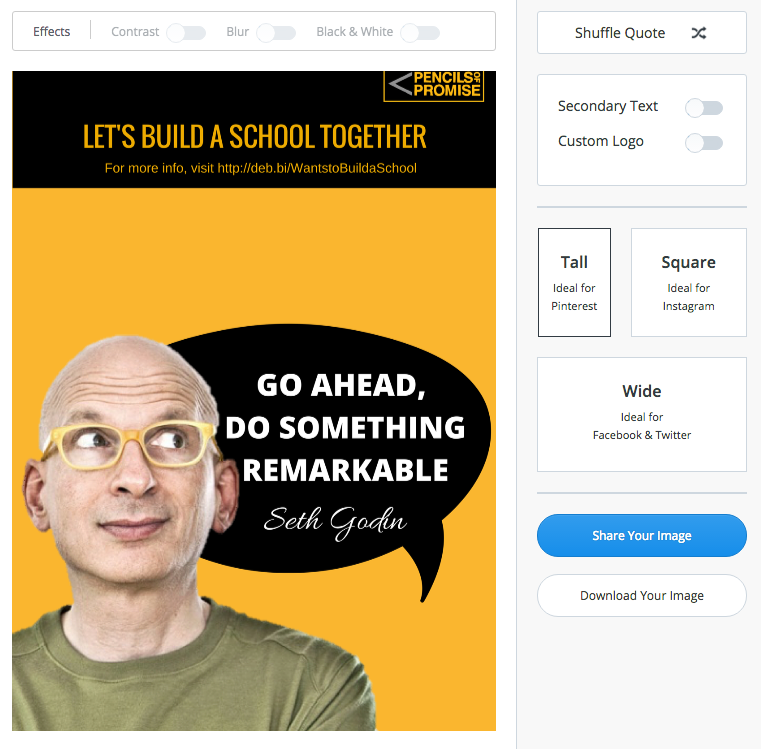
 STILL TOO MANY STEPS Whichever tool you use to create your images, the fact remains that if you wish to post across multiple social media channels (especially Instagram where you not only have to create the image, but also have to upload it to your phone), there are still a lot of steps involved. In this example, in order to post 3 image sizes across 4 channels, you need to:
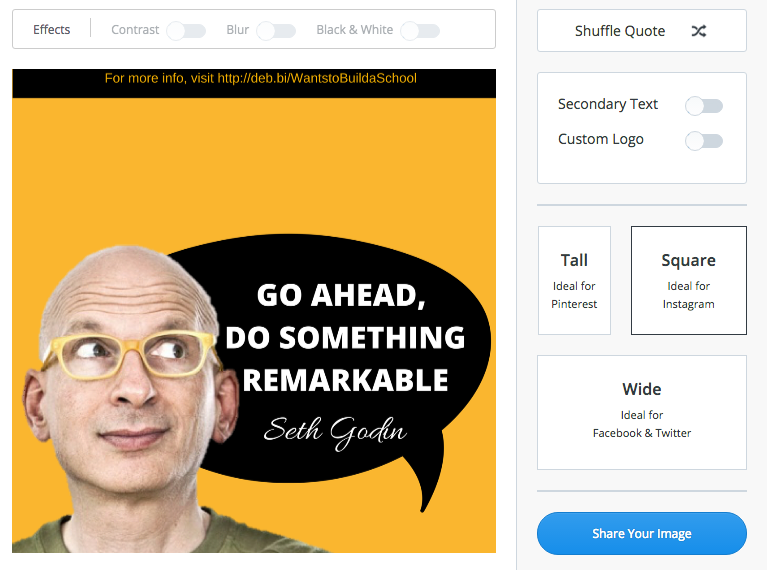
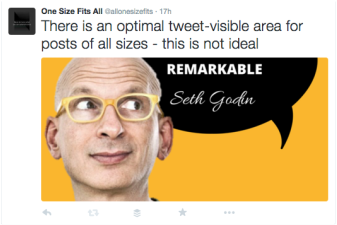
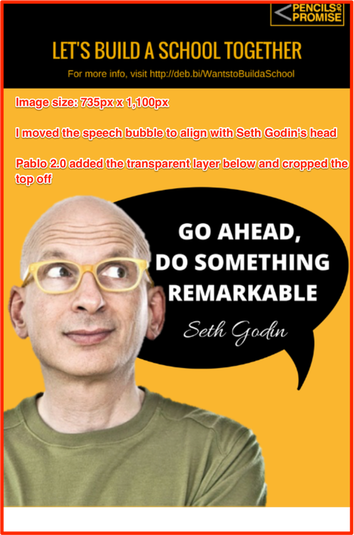
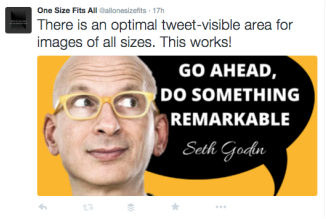
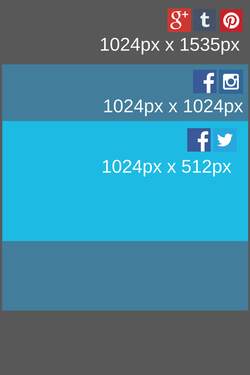
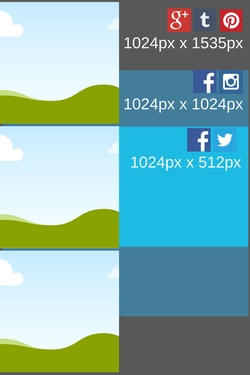
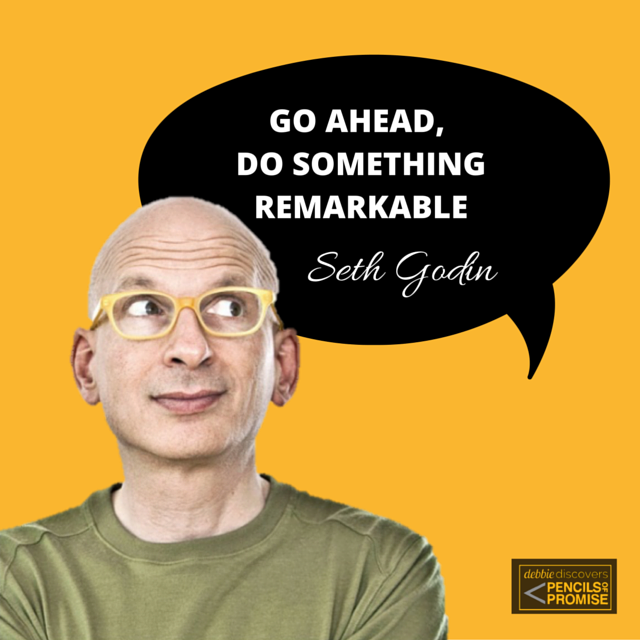
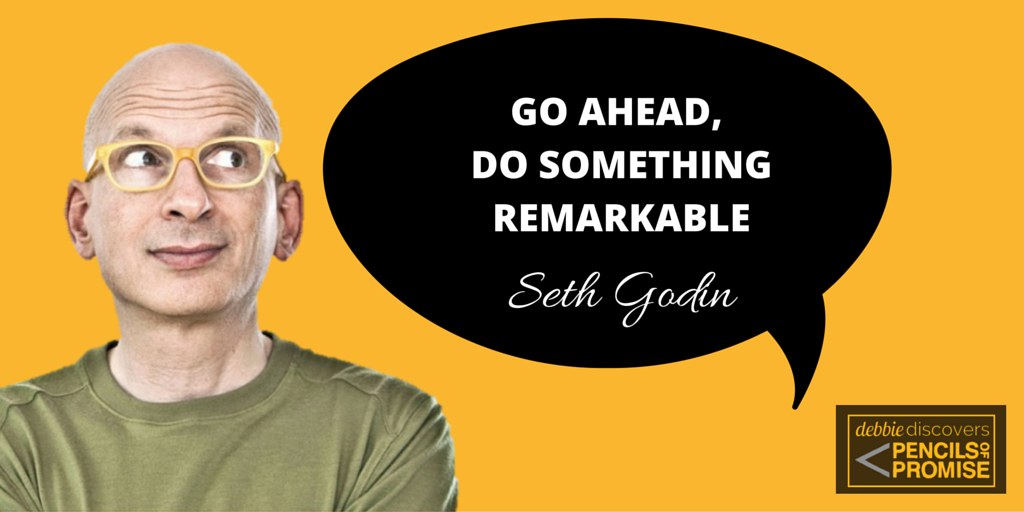
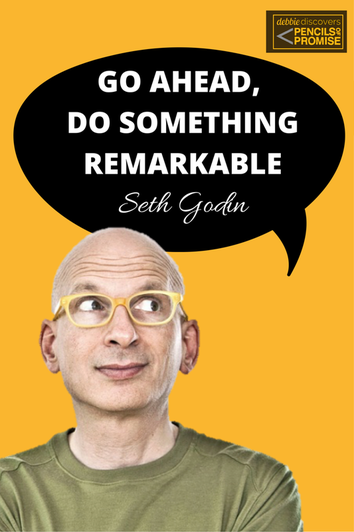
That's a total of 11 steps and does not include posting to Tumblr or Google Plus. IS THERE A 'ONE SIZE FITS ALL' HACK? I have been hypothesizing about creating a single optimal size that works across all social media channels. Currently, if you use a Tall image on Facebook or a Wide image on Pinterest, while it is not ideal, you can still get away with it because the entire image is shown. However, using a Tall or Square image on Twitter does not work because Twitter will only show a portion of your original image to fit it's 2:1 image frame, with the rest of your image hidden unless someone clicks to expand it. After a lot of experiementation, this is what I found. Twitter wlll post either the middle of your image (i.e. in the light blue section of the post on the right), or it will focus on showing faces found in the image (I suspect Twitter has some sort of facial recognition technology - if you go to my test Twitter account @allonesizefits, you can see that despite using many different Seth Godin image sizes and positions, Twitter shows the exact same shot of his entire face.) Therefore, if I want the quote to be shown in full, I have to ensure that the speech bubble is aligned with his head. In the images below, the left one was made in Canva with the recommended Pinterest image size 735px x 1,102px. This does not work as a tweet (shown below, click on the link to see in Twitter), as it shows his face but hides the top part of the quote. On the right, I have the image which I uploaded to Pablo (just slightly smaller at 735px x 1,100px) but in this image, I moved the speech bubble down such that it is aligned with Seth Godin's head. If I tweet this image (see below), it works!
Now that we've established how to create one single image that is optimized for all four social media channels (Facebook, Instagram, Twitter and Pinterest), let's see how many steps we can eliminate in order to simplify the process. Please see the next post for my suggested approach!
Comments
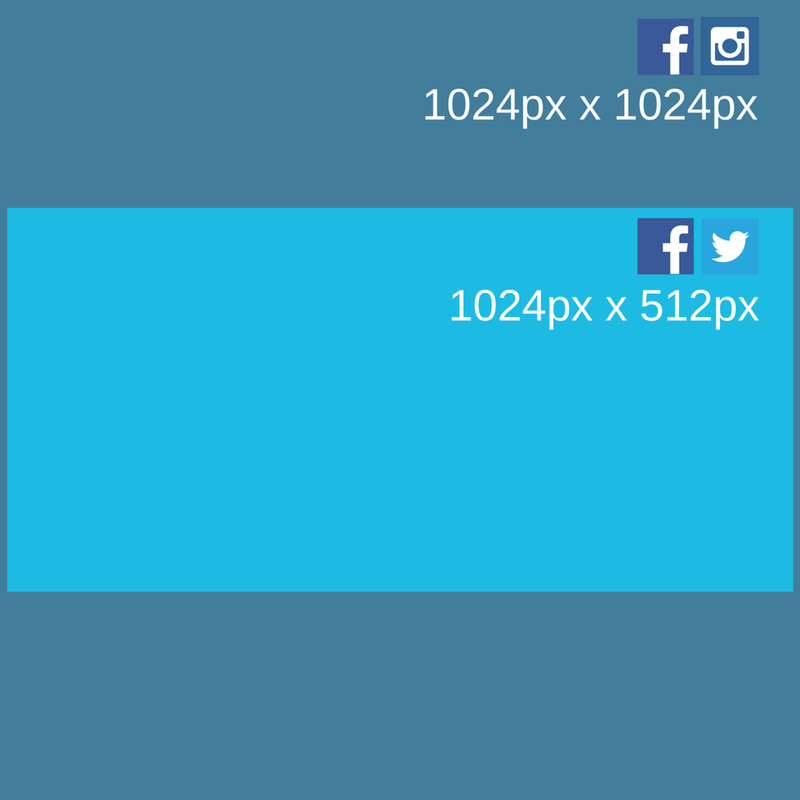
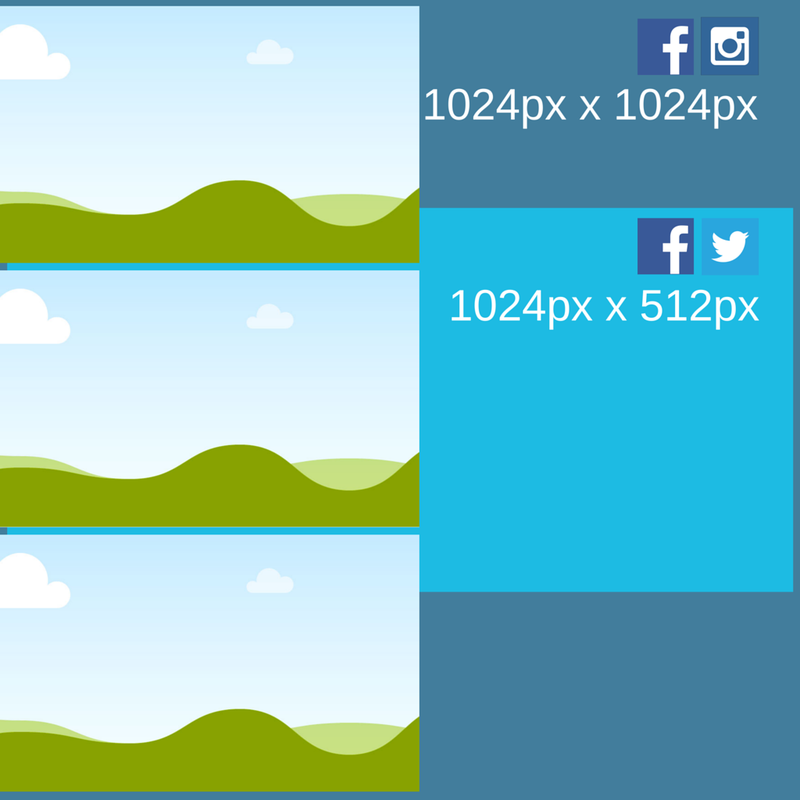
 For those of you that don't know Canva, it's an amazing, free, online graphic design tool that I am slightly obsessed with. Canva led me to Guy Kawasaki (someone else who I'm slightly obsessed with, ) and all the graphics used in my campaign have been made with Canva. Canva recently launched Canva for work (paid subscription) has an amazing magic resize button that let's you resize any social media post into posts that are optimized for all the different social media channels - from Facebook to Instagram to Twitter to Tumblr to Pinterest. Newsletter headers, email headers, presentations, Slideshares, Business cards, Wedding invitations, even Gift cerfiticates: see the full list on Canva's site. When you first set up your For Work account, Canva prompts you for your brand template by choosing your preferred colours and and fonts, which it then uses to create a suite of templates that you can use (social media posts, powerpoint presentations, marketing presentations etc). Any graphic created can be saved as a template and shared by teams. See below for examples of how I transform my Facebook / Instagram square posts into Twitter and Pinterest posts.
Canva for Work also allows you to add an unlimited number of trial team members for a month after which each team member has to pay $12.95.
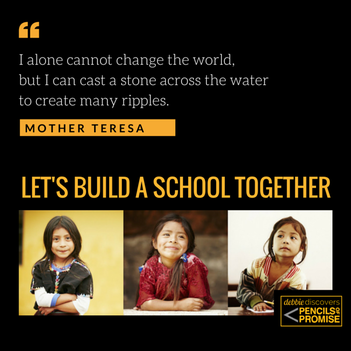
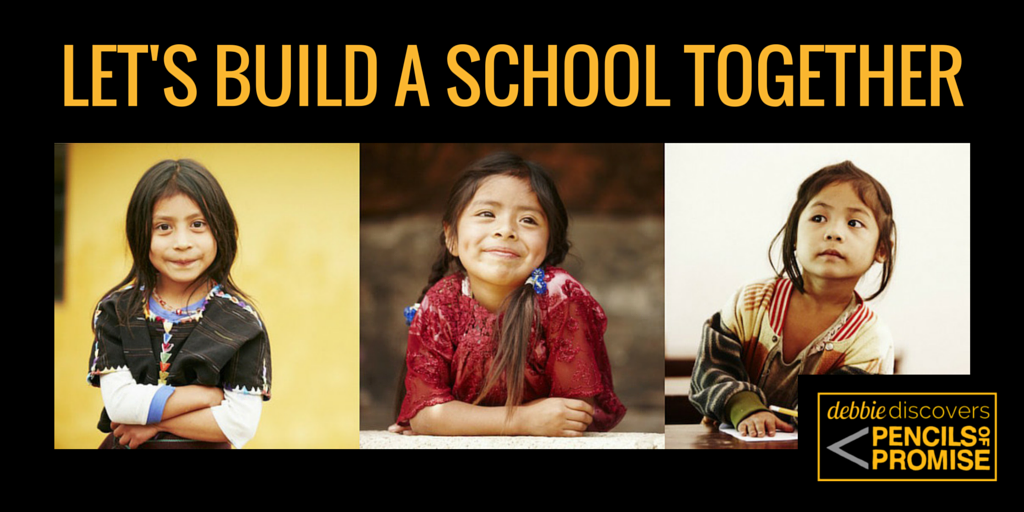
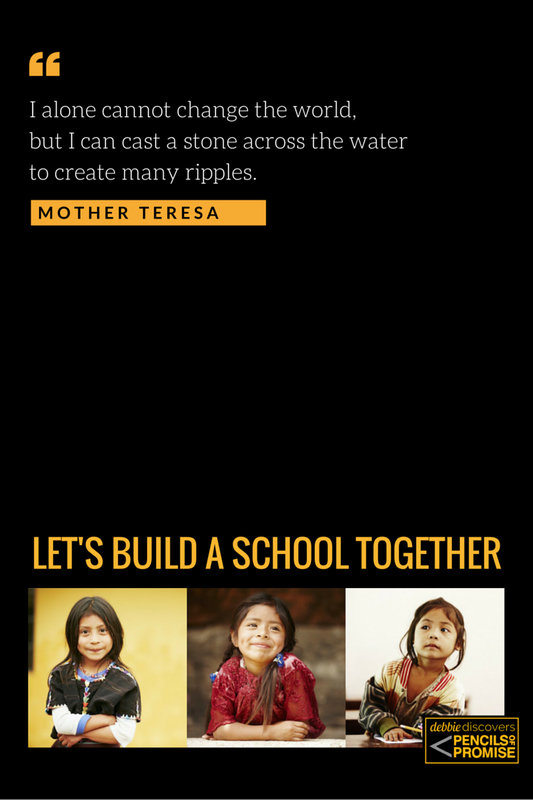
FOR A $25 DONATION So if anyone is interested in becoming a team member on my Canva for Work Pencils of Promise account and getting access to all the social media posts that I've created (education quotes, Seth Godin quotes, education for girls quotes, children's books quotes and adding more each day) which you can "fork" and rebrand as your own, for a $25 donation, I'll create your very own Canva for Work team account one-month trial and transfer all my templates into that team account. (Use the magic word Abracadabra in your donation remarks)! The first thing I noticed was that the new Weebly editor does not add proper open graph data. So when shared on Facebook, the image shown was a segment of my debbiediscovers logo So in order to improve shareability of this site: I had to add open graph meta tags into the header portion of each page: <!-- Update your html tag to include the itemscope and itemtype attributes. --> <html itemscope itemtype="http://schema.org/Webpage"> <!-- Schema.org markup for Google+ --> <meta itemprop="name" content="DebbieDiscovers Needs Your Help"> <meta itemprop="description" content="Let's build a school together with Pencils of Promise"> <meta itemprop="image" content="http://i.imgur.com/CCwSAX5.jpg"> <!-- Twitter Card data --> <meta name="twitter:card" content="summary_large_image"> <meta name="twitter:site" content="@debbiediscovers"> <meta name="twitter:title" content="DebbieDiscovers Needs Your Help"> <meta name="twitter:description" content="Let's build a school together with Pencils of Promise"> <meta name="twitter:creator" content="@debbiediscovers"> <!-- Twitter summary card with large image must be at least 280x150px --> <meta name="twitter:image:src" content="http://i.imgur.com/nz9InSi.jpg"> <!-- Open Graph Data for Facebook --> <meta property="og:url" content="http://www.debbiediscovers.weebly.com" /> <meta property="og:type" content="website" /> <meta property="og:title" content="DebbieDiscovers Needs Your Help" /> <meta property="og:description" content="Let's build a school together with Pencils of Promise: This is a dedicated fundraising site for friends and family to learn more about Debbie's campaign to build a school together in Laos with Pencils of Promise." /> <meta property="og:image" content="http://i.imgur.com/CCwSAX5.jpg" /> Note: Add this to each individual page under Pages, SEO Settings and Header Code (and not the overall Settings page). How to Add Open Graph Meta Tags to your Weebly Site1. At the top of the Weebly editor, click on Pages. 2. Go to the Page that you want to add the meta-tags to. Click on the three dots on the extreme left of the page. 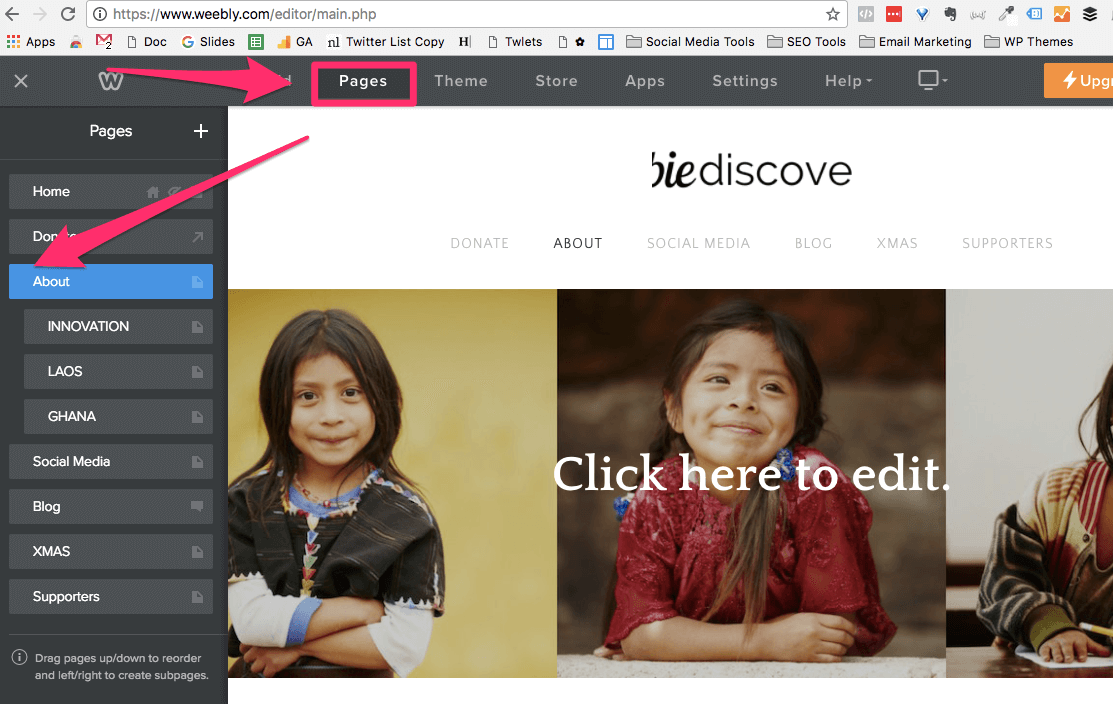 3. Once you're on the page, look for SEO Settings. 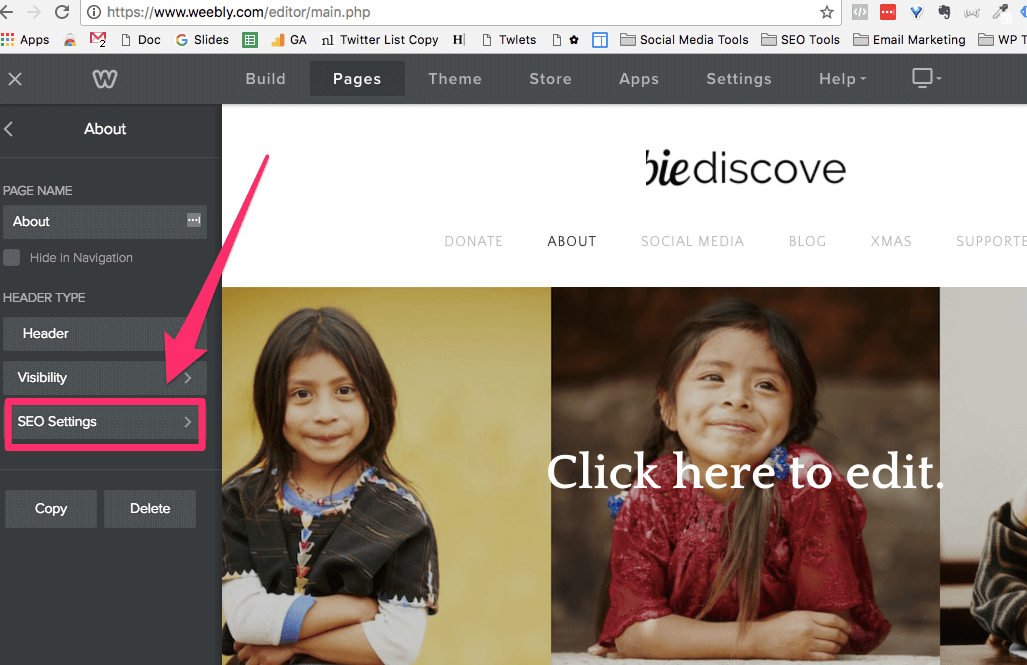 4. When you're on SEO Settings, scroll all the way down to the bottom until you see Headers. 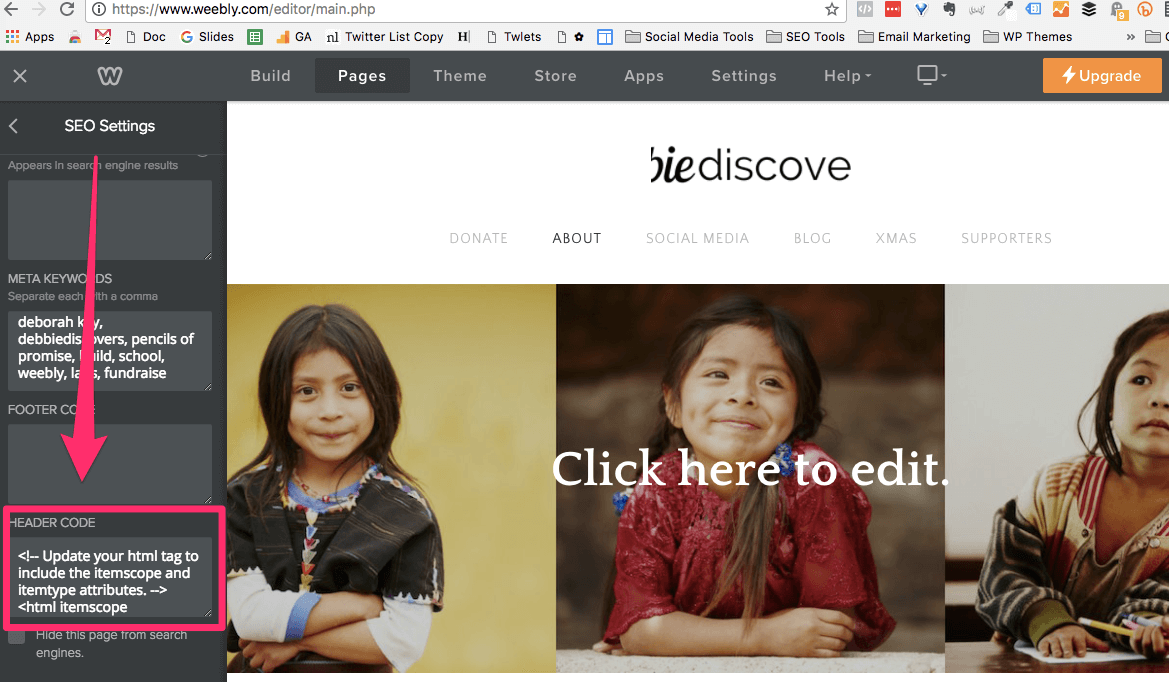 5. Add to the Header Code by modifying the meta-tags I listed above. If you're using Twitter, change the relevant information to link to your Twitter account, and your Twitter website card. You can check that Twitter is reading your meta-tags correctly by using this validator: https://cards-dev.twitter.com/validator. If you're using Facebook, you'll want to modify the open graph meta-tags. You can check what Facebook is grabbing from your site by using their debugger tool: https://developers.facebook.com/tools/debug/ Note: I used Imgur to generate a shareable link to my open graph images. The ideal size for a Facebook open graph image is 1200 by 630 pixels. The ideal size for a Twitter website card is 800by 418 pixels. Hope that helps! Let me know in the comments if it did, or if you have any questions! |
Categories
All
DEBORAH KAYThis is a simple blog to track my fundraising activities and to keep family, friends and supporters updated on my progress. Archives |


 RSS Feed
